注:更新于 2022-06-19
- Kubernetes 1.16.5 -> 1.24.0
- dashboard 2.0.4 -> 2.6.0
- Istio 1.7 -> Istio 1.14.1
上一篇 介绍了 Istio 1.14 的新特性,这对于 Istio 老用户们确实是个好消息。从本文开始,我们会用理论与实践相结合的形式讲解 Istio 知识点。工欲善其事必先利其器,本文向大家介绍最快的 Kubernetes & Istio 开发环境搭建方法,希望能帮助到大家。
Kubernetes
Istio 依托于 Kubernetes,因此,需要首先先安装 Kubernetes。Kubernetes 有许多安装的方法,包括:Minikube、kubeadm、Docker Desktop。本文选用较为便捷的 Docker Desktop。
安装 Docker Desktop
前往 Docker Desktop 选择对应系统安装包下载并安装。
安装 Kubernetes
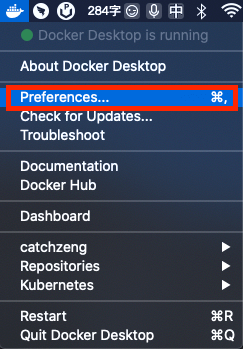
打开 Docker Desktop,点击 Preferences
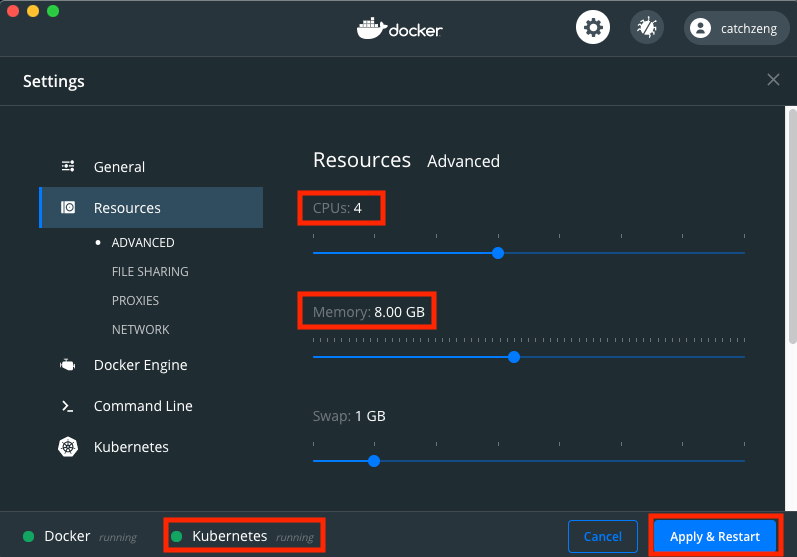
选择左侧 Kubernetes 栏,并勾选 Enable Kubernetes,最后点击 Apply & Restart
注:由于安装过程需要下载许多东西,请开启安全上网,避免网络问题导致安装失败
由于 Istio 1.14 要求 Kubernetes 1.21+,详见 https://makeoptim.com/service-mesh/istio1-14。因此,安装前请先升级 Docker Desktop 到最新,以便安装 Kubernetes 1.21+。

等待 Kubernetes 安装完毕后,左下角会显示 Kubernetes running 状态。这时,打开 Resources,在 Advanced 中将 CPU 至少设置为 4 核心,内存至少设置为 8 GB,最后点击 Apply & Restart
注:若机器资源不够,可使用
docker system prune指令释放更多可用资源。 该指令该默认会清除所有如下资源:
- 已停止的容器(
container) - 未被任何容器所使用的卷(
volume) - 未被任何容器所关联的网络(
network) - 所有悬空镜像(
image)
验证 Kubernetes
首先,先切换 Kubernetes 的 config 到 docker-desktop
1
2
$ kubectl config use docker-desktop
Switched to context "docker-desktop".
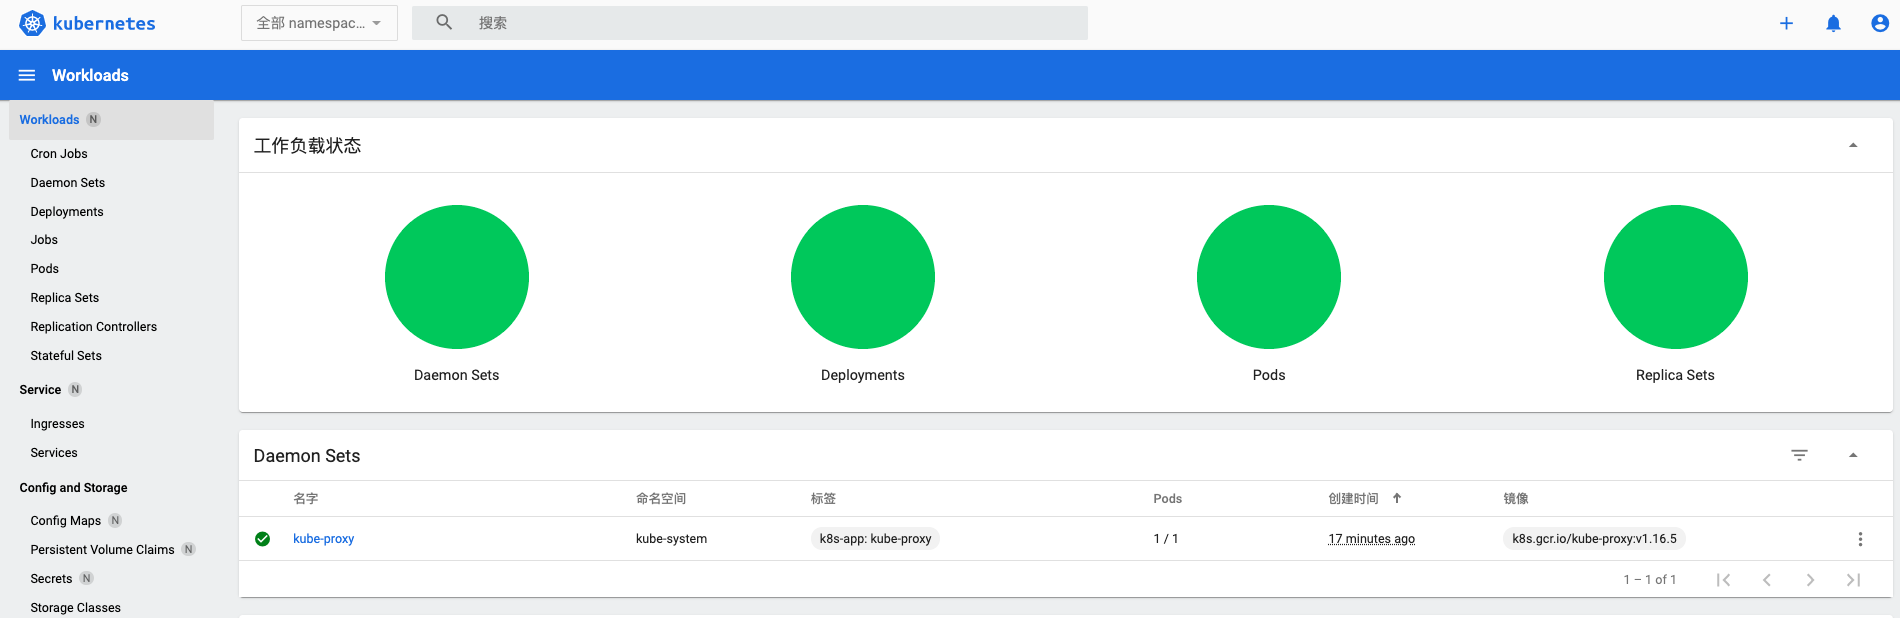
查看命名空间
1
2
3
4
5
6
7
$ kubectl get ns
NAME              STATUS   AGE
default           Active   22m
docker            Active   21m
kube-node-lease   Active   22m
kube-public       Active   22m
kube-system       Active   22m
部署 dashboard
执行以下安装命令
1
2
3
4
5
6
7
8
9
10
11
12
13
14
15
$ kubectl apply -f https://raw.githubusercontent.com/kubernetes/dashboard/v2.6.0/aio/deploy/recommended.yaml
namespace/kubernetes-dashboard created
serviceaccount/kubernetes-dashboard created
service/kubernetes-dashboard created
secret/kubernetes-dashboard-certs created
secret/kubernetes-dashboard-csrf created
secret/kubernetes-dashboard-key-holder created
configmap/kubernetes-dashboard-settings created
role.rbac.authorization.k8s.io/kubernetes-dashboard created
clusterrole.rbac.authorization.k8s.io/kubernetes-dashboard created
rolebinding.rbac.authorization.k8s.io/kubernetes-dashboard created
clusterrolebinding.rbac.authorization.k8s.io/kubernetes-dashboard created
deployment.apps/kubernetes-dashboard created
service/dashboard-metrics-scraper created
deployment.apps/dashboard-metrics-scraper created
执行以下安装命令,等待 dashboard pods 都运行起来
1
2
3
4
5
6
$ kubectl get pod -n kubernetes-dashboard -w
NAME                                        READY   STATUS              RESTARTS   AGE
dashboard-metrics-scraper-8c47d4b5d-495m6   0/1     ContainerCreating   0          25s
kubernetes-dashboard-5676d8b865-pf2z9       0/1     ContainerCreating   0          25s
kubernetes-dashboard-5676d8b865-pf2z9       1/1     Running             0          77s
dashboard-metrics-scraper-8c47d4b5d-495m6   1/1     Running             0          106s
查看 dashboard
1
2
$ kubectl proxy
Starting to serve on 127.0.0.1:8001

这是因为权限的原因,可通过以下方法获取 Token。
首先,创建 ServiceAccount
1
2
3
4
5
6
7
8
$ cat <<EOF | kubectl apply -f -
apiVersion: v1
kind: ServiceAccount
metadata:
  name: admin-user
  namespace: kubernetes-dashboard
EOF
serviceaccount/admin-user created
创建 ClusterRoleBinding 为 dashboard sa 授权集群权限 cluster-admin
1
2
3
4
5
6
7
8
9
10
11
12
13
14
15
$ cat <<EOF | kubectl apply -f -
apiVersion: rbac.authorization.k8s.io/v1
kind: ClusterRoleBinding
metadata:
  name: admin-user
roleRef:
  apiGroup: rbac.authorization.k8s.io
  kind: ClusterRole
  name: cluster-admin
subjects:
  - kind: ServiceAccount
    name: admin-user
    namespace: kubernetes-dashboard
EOF
clusterrolebinding.rbac.authorization.k8s.io/admin-user created
获取 Token
1
2
$ kubectl -n kubernetes-dashboard create token admin-user
eyJhbGciOiJSUzI1NiIsImtpZCI6Ik93b0U1NVFoUzJFbkdvbG1mRWh2emh0Mmd5U25wcEFMYXZUb2ttemkwUEEifQ.eyJhdWQiOlsiaHR0cHM6Ly9rdWJlcm5ldGVzLmRlZmF1bHQuc3ZjLmNsdXN0ZXIubG9jYWwiXSwiZXhwIjoxNjU1NzEwNjQzLCJpYXQiOjE2NTU3MDcwNDMsImlzcyI6Imh0dHBzOi8va3ViZXJuZXRlcy5kZWZhdWx0LnN2Yy5jbHVzdGVyLmxvY2FsIiwia3ViZXJuZXRlcy5pbyI6eyJuYW1lc3BhY2UiOiJrdWJlcm5ldGVzLWRhc2hib2FyZCIsInNlcnZpY2VhY2NvdW50Ijp7Im5hbWUiOiJhZG1pbi11c2VyIiwidWlkIjoiYTFhMGY2OWUtNzliOC00ZjExLWJlOTQtZTA5Yjk3YWJlNDZlIn19LCJuYmYiOjE2NTU3MDcwNDMsInN1YiI6InN5c3RlbTpzZXJ2aWNlYWNjb3VudDprdWJlcm5ldGVzLWRhc2hib2FyZDphZG1pbi11c2VyIn0.EOosJJiPdCpoyefnhB23uTW450sfh6WCZjFfnWF2geZqfaIcnDwupNAohVkD8z8PYN7J0o8vL5KqAEkw6vjvQnXqdcJHw61J8BtADqMiYxyhIDnIVpeak4mSfZsCBwsagZtS_T496-6x3cPmaxWErRTv_PIUTg1ExAXKxbFH8Btikrd9Y5GT5uuTuprmEApRyThpWpf7-HoSuAKi8ZsBANOpoHCIEdOh9smbVz-qyRoV3r9Pjqe9bmeexXnBwjPqAtM_0GJBlTr821i6THuncdpmcnG1_kkzJvCinOiT9_6DTtFQMpsQ1h70xvNs9Z8dB3kqp6juRUJHjJy8o2bEuA
拷贝 Token,并黏贴,即可进入 dashboard

至此,Kubernetes 已安装完毕,下面将 Istio 安装到 Kubernetes 中。
Istio
下载 Istio
-
访问 Istio release 页面下载与您操作系统对应的安装文件。在 macOS 或 Linux 系统中,也可以通过以下命令下载最新版本的 Istio:
1
$ curl -L https://istio.io/downloadIstio | sh -
-
切换到 Istio 包所在目录下。例如:Istio 包名为
istio-1.14.1,则:1 2 3 4 5 6 7 8 9 10
$ cd istio-1.14.1/ $ ls -l total 48 -rw-r--r-- 1 catchzeng staff 11348 Jun 8 10:11 LICENSE -rw-r--r-- 1 catchzeng staff 6016 Jun 8 10:11 README.md drwxr-x--- 3 catchzeng staff 96 Jun 8 10:11 bin -rw-r----- 1 catchzeng staff 796 Jun 8 10:11 manifest.yaml drwxr-xr-x 5 catchzeng staff 160 Jun 8 10:11 manifests drwxr-xr-x 24 catchzeng staff 768 Jun 8 10:11 samples drwxr-xr-x 5 catchzeng staff 160 Jun 8 10:11 tools
注:安装目录包含如下内容:
- samples/ 目录下,有示例应用程序
- bin/ 目录下,包含 istioctl 的客户端文件。istioctl 工具用于手动注入
Envoy sidecar代理。
-
将 istioctl 客户端路径增加到 path 环境变量中,macOS 或 Linux 系统的增加方式如下:
1
$ export PATH=$PWD/bin:$PATH
-
验证安装
1
2
$ istioctl version --remote=false
1.14.1
注:在使用 Bash 或 ZSH 控制台时,可以选择启动 auto-completion option。具体步骤如下:
-
Bash
1
2
$ cp tools/istioctl.bash ~
$ source ~/istioctl.bash
-
ZSH
1
2
$ cp tools/_istioctl ~
$ source ~/_istioctl
-
安装 Istio
配置文件
istioctl 内置了几个配置文件(config profiles)供我们选择。
1
2
3
4
5
6
7
8
9
10
$ istioctl profile list
Istio configuration profiles:
    default
    demo
    empty
    external
    minimal
    openshift
    preview
    remote
这些配置文件提供了对 Istio 控制平面和 Istio 数据平面 sidecar 的定制内容。 你可以从 Istio 内置配置文件的其中一个开始入手,然后根据您的特定需求进一步自定义配置文件。下面是常用几种内置配置文件的说明:
- default:根据默认的安装选项启用组件 (建议用于生产部署)。
- demo:这一配置具有适度的资源需求,旨在展示 Istio 的功能。它适合运行
Bookinfo应用程序和相关任务。 这是通过快速开始指导安装的配置,但是你以后可以通过自定义配置 启用其他功能来探索更高级的任务。 - minimal:使用 Istio 的流量管理功能所需的最少组件集。
- remote:用于配置多集群网格的远程集群。
- empty:什么都不部署。 这可用作自定义配置的基本配置文件。
- preview:
preview配置文件包含实验性功能。 目的是探索 Istio 的新功能。 不能保证稳定性,安全性和性能-使用风险自负。
| default | demo | minimal | remote | |
|---|---|---|---|---|
| istio-egressgateway | ||||
| istio-ingressgateway | ||||
| istiod |
如果你想进一步 自定义安装 Istio 和 addons,你可以在 istioctl install 的时候增加 --set <key>=<value> 配置项
如果你想查看配置文件中都有那些配置,可以通过 profile dump 命令
1
2
3
4
5
6
7
8
9
10
11
12
$ istioctl profile dump demo
components:
  egressGateways:
  - enabled: true
    k8s:
      resources:
        requests:
          cpu: 10m
          memory: 40Mi
    name: istio-egressgateway

...
安装
为了更接近生产环境。因此,这里选用 default 配置文件部署 Istio。
1
2
3
4
5
6
7
8
$ istioctl install --set profile=default
This will install the Istio 1.14.1 default profile with ["Istio core" "Istiod" "Ingress gateways"] components into the cluster. Proceed? (y/N) y
✔ Istio core installed
✔ Istiod installed
✔ Ingress gateways installed
✔ Installation complete                                                                                                                                                         Making this installation the default for injection and validation.

Thank you for installing Istio 1.14.  Please take a few minutes to tell us about your install/upgrade experience!  https://forms.gle/yEtCbt45FZ3VoDT5A
启动自动注入
通过以下命令,为 default 命名空间开启 sidecar 自动注入。
1
2
$ kubectl label namespace default istio-injection=enabled
namespace/default labeled
验证 Istio
-
部署
Bookinfo例子程序1 2 3 4 5 6 7 8 9 10 11 12 13 14 15
$ kubectl apply -f samples/bookinfo/platform/kube/bookinfo.yaml service/details created serviceaccount/bookinfo-details created deployment.apps/details-v1 created service/ratings created serviceaccount/bookinfo-ratings created deployment.apps/ratings-v1 created service/reviews created serviceaccount/bookinfo-reviews created deployment.apps/reviews-v1 created deployment.apps/reviews-v2 created deployment.apps/reviews-v3 created service/productpage created serviceaccount/bookinfo-productpage created deployment.apps/productpage-v1 created
-
验证
services & pods1 2 3 4 5 6 7
$ kubectl get services NAME TYPE CLUSTER-IP EXTERNAL-IP PORT(S) AGE details ClusterIP 10.108.129.83 <none> 9080/TCP 18s kubernetes ClusterIP 10.96.0.1 <none> 443/TCP 86m productpage ClusterIP 10.104.221.90 <none> 9080/TCP 17s ratings ClusterIP 10.101.178.252 <none> 9080/TCP 18s reviews ClusterIP 10.107.61.70 <none> 9080/TCP 18s
1
2
3
4
5
6
7
8
9
10
11
12
13
14
15
16
17
18
19
20
$ kubectl get pods -w
NAME                              READY   STATUS            RESTARTS   AGE
details-v1-74f858558f-fnr9q       0/2     PodInitializing   0          107s
productpage-v1-76589d9fdc-ppgtp   0/2     PodInitializing   0          105s
ratings-v1-7855f5bcb9-gh6zt       0/2     PodInitializing   0          106s
reviews-v1-64bc5454b9-sfzs2       0/2     PodInitializing   0          105s
reviews-v2-76c64d4bdf-4g4b8       0/2     PodInitializing   0          106s
reviews-v3-5545c7c78f-87m6l       0/2     PodInitializing   0          106s
reviews-v3-5545c7c78f-87m6l       1/2     Running           0          5m10s
reviews-v3-5545c7c78f-87m6l       2/2     Running           0          5m12s
details-v1-74f858558f-fnr9q       1/2     Running           0          5m57s
details-v1-74f858558f-fnr9q       2/2     Running           0          5m59s
ratings-v1-7855f5bcb9-gh6zt       1/2     Running           0          7m3s
ratings-v1-7855f5bcb9-gh6zt       2/2     Running           0          7m4s
reviews-v1-64bc5454b9-sfzs2       1/2     Running           0          7m10s
reviews-v1-64bc5454b9-sfzs2       2/2     Running           0          7m11s
reviews-v2-76c64d4bdf-4g4b8       1/2     Running           0          7m21s
reviews-v2-76c64d4bdf-4g4b8       2/2     Running           0          7m24s
productpage-v1-76589d9fdc-ppgtp   1/2     Running           0          8m11s
productpage-v1-76589d9fdc-ppgtp   2/2     Running           0          8m12s
注:可通过 -w 观察 pod 的状态,READY 为 2/2 表示该 pod,启动了应用本身和 sidecar 这两个容器
-
验证服务访问
1
2
$ kubectl exec -it $(kubectl get pod -l app=ratings -o jsonpath='{.items[0].metadata.name}') -c ratings -- curl productpage:9080/productpage | grep -o "<title>.*</title>"
<title>Simple Bookstore App</title>
-
部署
gateway1 2 3
$ kubectl apply -f samples/bookinfo/networking/bookinfo-gateway.yaml gateway.networking.istio.io/bookinfo-gateway created virtualservice.networking.istio.io/bookinfo created
确认部署
1 2 3
$ kubectl get gateway NAME AGE bookinfo-gateway 19s -
获取访问路径
1
2
3
4
$ kubectl get services -n istio-system
NAME                   TYPE           CLUSTER-IP       EXTERNAL-IP   PORT(S)                                                      AGE
istio-ingressgateway   LoadBalancer   10.108.194.170   localhost     15021:30409/TCP,80:30609/TCP,443:31666/TCP,15443:31613/TCP   8m47s
istiod                 ClusterIP      10.101.125.4     <none>        15010/TCP,15012/TCP,443/TCP,15014/TCP,853/TCP                10m
通过查看
istio-ingressgateway的EXTERNAL-IP为localhost,可得知访问地址为 http://localhost/productpage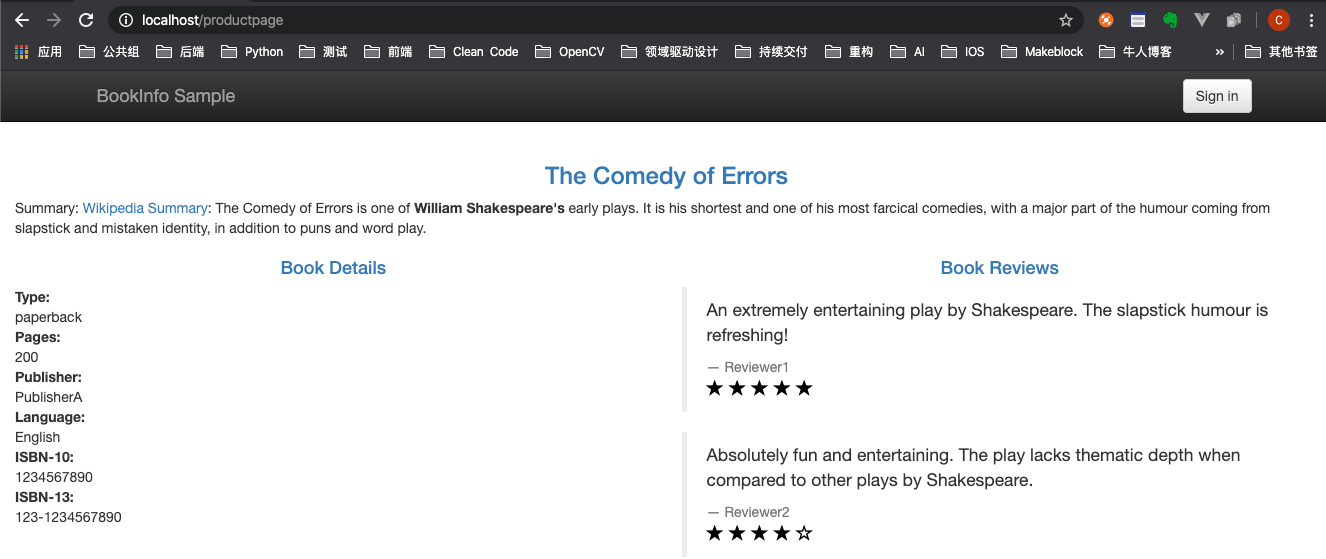
清理
验证完后,想要清理资源,可以执行以下命令
-
BookInfo
1
2
3
4
5
6
7
8
9
10
11
12
13
14
15
16
17
18
19
20
21
$ samples/bookinfo/platform/kube/cleanup.sh
namespace ? [default]
using NAMESPACE=default
virtualservice.networking.istio.io "bookinfo" deleted
gateway.networking.istio.io "bookinfo-gateway" deleted
Application cleanup may take up to one minute
service "details" deleted
serviceaccount "bookinfo-details" deleted
deployment.apps "details-v1" deleted
service "ratings" deleted
serviceaccount "bookinfo-ratings" deleted
deployment.apps "ratings-v1" deleted
service "reviews" deleted
serviceaccount "bookinfo-reviews" deleted
deployment.apps "reviews-v1" deleted
deployment.apps "reviews-v2" deleted
deployment.apps "reviews-v3" deleted
service "productpage" deleted
serviceaccount "bookinfo-productpage" deleted
deployment.apps "productpage-v1" deleted
Application cleanup successful
-
Istio
1
2
3
4
5
6
7
8
9
10
11
12
13
14
15
16
17
18
19
20
21
22
23
24
25
26
27
28
29
30
31
32
33
34
35
36
37
38
39
40
41
42
43
44
45
46
47
48
49
50
51
52
53
54
55
56
57
$ istioctl manifest generate --set profile=default | kubectl delete --ignore-not-found=true -f -
customresourcedefinition.apiextensions.k8s.io "authorizationpolicies.security.istio.io" deleted
customresourcedefinition.apiextensions.k8s.io "destinationrules.networking.istio.io" deleted
customresourcedefinition.apiextensions.k8s.io "envoyfilters.networking.istio.io" deleted
customresourcedefinition.apiextensions.k8s.io "gateways.networking.istio.io" deleted
customresourcedefinition.apiextensions.k8s.io "istiooperators.install.istio.io" deleted
customresourcedefinition.apiextensions.k8s.io "peerauthentications.security.istio.io" deleted
customresourcedefinition.apiextensions.k8s.io "proxyconfigs.networking.istio.io" deleted
customresourcedefinition.apiextensions.k8s.io "requestauthentications.security.istio.io" deleted
customresourcedefinition.apiextensions.k8s.io "serviceentries.networking.istio.io" deleted
customresourcedefinition.apiextensions.k8s.io "sidecars.networking.istio.io" deleted
customresourcedefinition.apiextensions.k8s.io "telemetries.telemetry.istio.io" deleted
customresourcedefinition.apiextensions.k8s.io "virtualservices.networking.istio.io" deleted
customresourcedefinition.apiextensions.k8s.io "wasmplugins.extensions.istio.io" deleted
customresourcedefinition.apiextensions.k8s.io "workloadentries.networking.istio.io" deleted
customresourcedefinition.apiextensions.k8s.io "workloadgroups.networking.istio.io" deleted
serviceaccount "istio-ingressgateway-service-account" deleted
serviceaccount "istio-reader-service-account" deleted
serviceaccount "istiod" deleted
serviceaccount "istiod-service-account" deleted
clusterrole.rbac.authorization.k8s.io "istio-reader-clusterrole-istio-system" deleted
clusterrole.rbac.authorization.k8s.io "istio-reader-istio-system" deleted
clusterrole.rbac.authorization.k8s.io "istiod-clusterrole-istio-system" deleted
clusterrole.rbac.authorization.k8s.io "istiod-gateway-controller-istio-system" deleted
clusterrole.rbac.authorization.k8s.io "istiod-istio-system" deleted
clusterrolebinding.rbac.authorization.k8s.io "istio-reader-clusterrole-istio-system" deleted
clusterrolebinding.rbac.authorization.k8s.io "istio-reader-istio-system" deleted
clusterrolebinding.rbac.authorization.k8s.io "istiod-clusterrole-istio-system" deleted
clusterrolebinding.rbac.authorization.k8s.io "istiod-gateway-controller-istio-system" deleted
clusterrolebinding.rbac.authorization.k8s.io "istiod-istio-system" deleted
validatingwebhookconfiguration.admissionregistration.k8s.io "istio-validator-istio-system" deleted
configmap "istio" deleted
configmap "istio-sidecar-injector" deleted
mutatingwebhookconfiguration.admissionregistration.k8s.io "istio-sidecar-injector" deleted
deployment.apps "istio-ingressgateway" deleted
deployment.apps "istiod" deleted
Warning: policy/v1beta1 PodDisruptionBudget is deprecated in v1.21+, unavailable in v1.25+; use policy/v1 PodDisruptionBudget
poddisruptionbudget.policy "istio-ingressgateway" deleted
poddisruptionbudget.policy "istiod" deleted
role.rbac.authorization.k8s.io "istio-ingressgateway-sds" deleted
role.rbac.authorization.k8s.io "istiod" deleted
role.rbac.authorization.k8s.io "istiod-istio-system" deleted
rolebinding.rbac.authorization.k8s.io "istio-ingressgateway-sds" deleted
rolebinding.rbac.authorization.k8s.io "istiod" deleted
rolebinding.rbac.authorization.k8s.io "istiod-istio-system" deleted
Warning: autoscaling/v2beta2 HorizontalPodAutoscaler is deprecated in v1.23+, unavailable in v1.26+; use autoscaling/v2 HorizontalPodAutoscaler
horizontalpodautoscaler.autoscaling "istio-ingressgateway" deleted
horizontalpodautoscaler.autoscaling "istiod" deleted
service "istio-ingressgateway" deleted
service "istiod" deleted

$ istioctl tag remove default
Revision tag default removed
$ kubectl delete namespace istio-system
namespace "istio-system" deleted
$ kubectl label namespace default istio-injection-
namespace/default unlabeled
小结
至此,我们已经将 Kubernetes & Istio 开发环境搭建完毕。下一篇开始,我们便用理论和实践相结合的形式讲解 Istio 的特性,咱们下一篇见。
 Service Mesh - Istio 1.5 拥抱单体,简化架构